More stuff for DiP-M. Jón Þóroddur gave to me a PCB from FoxDelta and a microcontroller with some custom firmware from Chris’s Cross Country Wireless. I had most of the parts lying around and few days later I had built the board. It was fairly easy and probably one of the cheapest TNCs that are available, altho’ I wont comment on the function of it until I’m through with testing everything.
I also finished hooking the TH-25AT Kenwood radio to it so everything is getting in shape. The testing I did earlier did provide some useful data, for example, I can’t keep the position updated on the DiP-M via GPS module as the current drawn is too high. I’d need to find another module for that.
However, when connecting to the FoxDigi I ran into some problems. I’m a regular Linux user and have been for many years. So, I’m gonna write a small piece here ’bout how to connect and configure your FoxDigi on a linux box!
First of all find a terminal program. You can use screen or minicom or any other terminal program available. I use minicom, so the instructions are focused on that.
Get minicom
sudo apt-get install minicom
Run minicom
sudo minicom -s
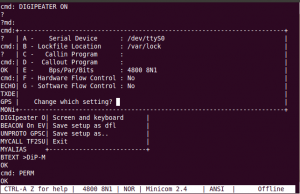
sudo is so that you can save your changes to the default file for minicom. Change the following settings to match your modem. If you have the 4800bps version of FoxDigi, you keep it at 4800bps, and change it to 9600bps if you have that version.
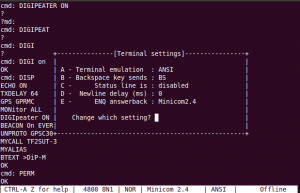
Next you’d like to change the terminal settings to this:
If you can’t find these settings, just choose ctrl+a followed by z and choose T. That should bring the terminal settings up. The last thing to do is to save these settings as default or you can save it as a special file for later use.
After that you should be able to just start minicom using the command
minicom
In terminal and it should connect to the FoxDigi. Use HELP to display list of commands and DISP to see what configurations are there to start with. The set of commands is
cmd: HELP
Commands are case insensitive
Use backspace key (<–) for correction
Use the DISP command to display all optionsCommands (with example):
MYCALL (mycall g4hyg-9)
UNPROTO (unproto aprs v wide3-3) – Fixed station APRS unproto
UNPROTO (unproto gpsc30 v wide1-1 v wide2-2) – Mobile station APRS unproto
UNPROTO (unproto aprs v ariss v sgate v wide2-2) – ISS APRS unproto
BTEXT (btext >FoxDigi test) – beacon comment – 100 chars max
BEACON (beacon every n)- n=0 is off and 1<n<60 mins
MONitor (mon all, mon me, or mon off)
DIGIpeat (digi all, digi on or digi off) switch 8 digi off)
MYALIAS (myalias wide1-1) for fill-in digipeater
PERM (to store set-up in EEPROM)
ECHO (echo on or echo off)
TXDELAY (txdelay n 0 to 201)
CAL (calibrate mode – testing only)
CONV (converse mode – Ctrl C to exit)
That should get you started. Remember to write PERM command before you finish to save settings permanently.
More details on each command, as the Foxdigi manual does not state each command clearly enough. Note: This is a work in progress, I’ll continue updating this post as I figure more out. All commands are without quota marks.
- DISP – Displays the settings which are in use.
- HELP – Should be clear enough, it prints out the list of commands that are available, with some information on each command.
- ECHO – One of the most useless commands IMHO, if value is ON; input text is shown in the terminal, if OFF input text is not shown, what the purpose of this is, is above my understanding, if someone could give more info on the usability of this I’d be very glad.
- TXDELAY – Sets the delay of transmission of packets after PTT is opened. Value is in ms.
- MONitor – Syntax “MON all” “MON me” or “MON off” I don’t really understand this, yet, let’s leave it ON for now.
- MYCALL – The callsign of the digipeater/tracker, i.e. your callsign with an SSID (-9 or -3 for example) unless you apply for a special callsign for the unit.
- MYALIAS – The Alias of the digipeater. Set this to WIDE1-1 for fill in digipeater, or the digipeater callsign if you want to keep the digipeater private.
- DIGIpeat – Syntax is “DIGI on” , “DIGI off” or “DIGI all” I don’t really know what exactly the difference is between ON and ALL, but I assume that ON only works as WIDE1-1 and ALL works on WIDE2, WIDE3 or any other path. I will however do some testing in the following days and confirm this.
- BEACON – syntax is “BEACON EVERY n” where n are the minutes between packets.
- BTEXT – Beacon message. Can include lat/lon, some information or other. To send a fixed position, use the following syntax: “BTEXT !1234.56N/01234.56W#Some comment here#” (Note: ! is to start a comment. # is to make a brake between information)
- PERM – Saves the settings permanently, this must be done each time when changes are done to the unit!!!!


Pingback: Að setja upp APRSd | Úlfr's Inn